# BFF实战
# 初始化项目
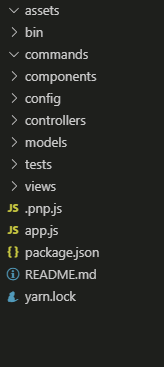
初始化项目
npm init -y
使用yarn的新特性安装,不需要繁重的modules 在package.json里添加
{
  "name": "nodeDemo",
  "version": "1.0.0",
  "description": "",
  "main": "index.js",
  "scripts": {
    "test": "echo \"Error: no test specified\" && exit 1"
  },
  // 添加这个选项,生成.pnp文件
  "installConfig": {
    "pnp": true
  },
  "keywords": [],
  "author": "",
  "license": "ISC",
  "dependencies": {
    "koa": "^2.8.1"
  }
}
2
3
4
5
6
7
8
9
10
11
12
13
14
15
16
17
18
19
使用yarn安装包
yarn add koa
此时发现并没有modules文件夹,只有一个.pnp.js文件 添加一个基本的app.js文件
const Koa = require('koa');
const app = new Koa();

app.listen(3000, () => {
    console.log('服务启动成功');
});
2
3
4
5
6
使用yarn启动,成功
yarn node app.js
或者使用
node --require=./.pnp.js app.js
# 建立项目
将yii生成的mvc架构直接拷贝过来,把用不到的删一删
 ;
;
目录结构有了,然后就仿照着php的文件创建文件方法
在 models 下 创建 Books.js
class Books{
    getList() {

    }
}
2
3
4
5
在 controllers 下 创建 BooksController.js
const Books = require('../models/Books');

class BookController{
    actionIndex() {
        const $model = new Books();
        const result = $model.getList();
        // 渲染页面
    }
    actionCreate() {

    }
}

module.exports = BookController;
2
3
4
5
6
7
8
9
10
11
12
13
14
创建 BaseController.js
class BaseController{
    constructor() {

    }
}

module.exports = BaseController;
2
3
4
5
6
7
创建 SiteController.js
const Controller = require('./BaseController');

class SiteController extends Controller{
    constructor() {
        super()
    }
    actionIndex() {

    }
}
2
3
4
5
6
7
8
9
10
顺便再创建个 index.js 后面补充
在 config 下 创建个index.js
const {extend} = require('lodash');
let config = {};
if (process.env.NODE_ENV == 'development') {
    const localConfig = {
        port: 3000
    }
    config = extend(config, localConfig);
}
if (process.env.NODE_ENV == 'production') {
    const prodConfig = {
        port: 80
    }
    config = extend(config, prodConfig);
}
module.exports = config;
2
3
4
5
6
7
8
9
10
11
12
13
14
15
这里需要安装 lodash 使用 extend
yarn add lodash
同时为了在环境变量中注入 安装 cross-env
yarn add cross-env
这样就可以修改 package.json 的命令
{
    ...
    "scripts": {
    "dev": "yarn cross-env NODE_ENV=development node app.js"
    },
    ...
}
2
3
4
5
6
7
# 配置路由
安装 koa-simple-router
yarn add koa-simple-router
在 controller 文件夹下继续补充文件 IndexController.js
const Controller = require('./BaseController');

class IndexController extends Controller{
    constructor() {
        super()
    }
    actionIndex(ctx, next) {
        ctx.body = {
            data: 'hello'
        }
    }
}
module.exports = IndexController;
2
3
4
5
6
7
8
9
10
11
12
13
index.js
const router = require('koa-simple-router');
const IndexController = require('./IndexController');
const indexController = new IndexController();
const BooksController = require('./BooksController');
const booksController = new BooksController();

const controllersInit = (app) => {
    app.use(router(_ => {
        _.get('/', indexController.actionIndex)
        _.get('/books/list', booksController.actionIndex)
        _.get('/books/create', booksController.actionCreate)
    }))
}

module.exports = controllersInit;
2
3
4
5
6
7
8
9
10
11
12
13
14
15
在 app.js 中注册路由
const Koa = require('koa');
const app = new Koa();
const config = require('./config/index');
const controllersInit = require('./controllers/index');

// 路由的注册中心
controllersInit(app);
app.listen(config.port, () => {
    console.log('服务启动成功');
});
2
3
4
5
6
7
8
9
10
ok,完活,打开3000页面可以看到输出 data: 'hello'
再把 /books/list 路由配好 把Books的内容输出出来 Book.js
class Books{
    getList() {
        return {
            data: '我是Models数据获取方'
        }
    }
}

module.exports = Books;
2
3
4
5
6
7
8
9
BookController.js
const Books = require('../models/Books');

class BookController{
    actionIndex(ctx, next) {
        const $model = new Books();
        const result = $model.getList();
        ctx.body = result;
        // 渲染页面
    }
    actionCreate() {

    }
}

module.exports = BookController;
2
3
4
5
6
7
8
9
10
11
12
13
14
15
# models 很重要
对 models 下的Book进行丰富
/*
 * @Description: 实现Books的数据模型
 * @Author: zxy
 * @Date: 2019-08-04 22:29:33
 */
class Books{
    /**
     * Books类,实现获取后台有关于图书相关的数据类
     * @class {type}
     *
     */
    /**
     * Books类,实现获取后台有关于图书相关的数据类
     * @param {object} app app KOA2执行的上下文
     *
     */
    constructor(app) {
        this.app = app;
    }
    /**
     * 获取后台图书的全部列表
     * @param {*} options options 设置访问数据的参数
     * @example
     * return new Promise
     * getList(options)
     */
    getList(options) {
        return {
            data: '我是Models数据获取方'
        }
    }
}

module.exports = Books;
2
3
4
5
6
7
8
9
10
11
12
13
14
15
16
17
18
19
20
21
22
23
24
25
26
27
28
29
30
31
32
33
34
生成 Doc 文档 全局安装 jsdoc 使用命令生成文档
jsdoc ./**/*.js -d ./doc/jsdoc
# view 层 swig
在view 下的创建 view层 layouts 下的 layouts.html
<!doctype html>
<html>
<head>
    <meta charset="utf-8">
    <title>{% block title %}My Site{% endblock %}</title>

    {% block head %}

    {% endblock %}
</head>
<body>
    {% block content %}{% endblock %}
    {% block scripts %}{% endblock %}
</body>
</html>
2
3
4
5
6
7
8
9
10
11
12
13
14
15
Books 下的 create.html
{% extends './layout.html' %}

{% block title %}新增新闻{% endblock %}

{% block head %}
{% parent %}

{% endblock %}


{% block scripts %}
<script>
console.log('新增新闻')
</script>
{% endblock %}
2
3
4
5
6
7
8
9
10
11
12
13
14
15
Books 下的 list.html
{% extends './layout.html' %}

{% block title %}新闻列表{% endblock %}

{% block head %}
{% parent %}

{% endblock %}

{% block scripts %}
<script>
console.log('新闻列表')
</script>
{% endblock %}
2
3
4
5
6
7
8
9
10
11
12
13
14
安装 koa-swig
yarn add koa-swig
将swig注入app
/*
 * @Description: In User Settings Edit()
 * @Author: your name
 * @Date: 2019-08-05 01:17:27
 * @LastEditTime: 2019-08-05 01:21:09
 * @LastEditors: Please set LastEditors
 */
const Koa = require('koa');
const app = new Koa();
const config = require('./config/index');
const controllersInit = require('./controllers/index');
//--------------------下面新加---------------------
const render = require('koa-swig');
const co = require('co');

app.context.render = co.wrap(render({
    root: config.viewDir,
    autoescape: true,
    cache: false,
    ext: 'html',
    writeBody: false
}))
//--------------------上面新加---------------------
// 路由的注册中心
controllersInit(app);
app.listen(config.port, () => {
    console.log('服务启动成功');
});
2
3
4
5
6
7
8
9
10
11
12
13
14
15
16
17
18
19
20
21
22
23
24
25
26
27
28
同时为了方便,再在config的index中进行配置
const {extend} = require('lodash');
const {join} = require('path');
// -------------------------
let config = {
    viewDir: join(__dirname,'..','views')
};
// -----------------------------
if (process.env.NODE_ENV == 'development') {
    const localConfig = {
        port: 3000
    }
    config = extend(config, localConfig);
}
if (process.env.NODE_ENV == 'production') {
    const prodConfig = {
        port: 80
    }
    config = extend(config, prodConfig);
}
module.exports = config;
2
3
4
5
6
7
8
9
10
11
12
13
14
15
16
17
18
19
20
在 IndexController.js 中使用欧冠render渲染 index 根页面
const Controller = require('./BaseController');

class IndexController extends Controller{
    constructor() {
        super()
    }
    // ----------------------
    async actionIndex(ctx, next) {
        ctx.body = await ctx.render('Index/index')
    }
    // ----------------------
}
module.exports = IndexController;
2
3
4
5
6
7
8
9
10
11
12
13
打开页面 localhost:3000 可以看到index.html 中渲染的页面
接下来就是进行批量的改造了 改造 BooksController.js 可以将参数传递过去
const Books = require('../models/Books');

class BookController{
    async actionIndex(ctx, next) {
        const $model = new Books();
        const result = $model.getList();
        // 将参数传递到前端页面去
        ctx.body = await ctx.render('Books/list', {
            result
        })
    }
    async actionCreate() {
        ctx.body = await ctx.render('Books/create')
    }
}

module.exports = BookController;
2
3
4
5
6
7
8
9
10
11
12
13
14
15
16
17
在 Books/list.html 中接受参数
 {% extends '../layouts/layouts.html' %}

{% block title %}新闻列表{% endblock %}

{% block head %}
{% parent %}

{% endblock %}
{% block content %}
 <div>
     <h1>新闻列表</h1>
     <!-- 接收后端传来的参数 -->
     {{result.data}}
 </div>
{% endblock %}
{% block scripts %}
<script>
console.log('新闻列表')
</script>
{% endblock %}
2
3
4
5
6
7
8
9
10
11
12
13
14
15
16
17
18
19
20
接下来在页面上加点样式 在 assets 下建立 scripts 和 styles 文件夹 同时建立 css 和 js 脚本 然后在 index.html 中引入样式
 {% extends '../layouts/layouts.html' %}

 {% block title %}跟目录{% endblock %}

 {% block head %}
<link rel="stylesheet" href="/styles/index.css">

 {% endblock %}

 {% block content %}
BFF架构实战
 {% endblock %}

 {% block scripts %}
 <script src="/scripts/index"></script>
 {% endblock %}
2
3
4
5
6
7
8
9
10
11
12
13
14
15
16
然后在config 中配置assets 的路径
let config = {
    viewDir: join(__dirname,'..','views'),
    staticDir: join(__dirname,'..','assets')
};
2
3
4
安装 koa-static 管理静态资源
yarn add koa-static
修改 app.js 文件添加静态管理
const Koa = require('koa');
const app = new Koa();
const config = require('./config/index');
const controllersInit = require('./controllers/index');
const render = require('koa-swig');
const co = require('co');
// -------------------------------------------------------------------
const serve = require('koa-static');

app.context.render = co.wrap(render({
    root: config.viewDir,
    autoescape: true,
    cache: false,
    ext: 'html',
    writeBody: false
}))
app.use(serve(config.staticDir));
// ---------------------------------------------------------------
// 路由的注册中心
controllersInit(app);
app.listen(config.port, () => {
    console.log('服务启动成功');
});
2
3
4
5
6
7
8
9
10
11
12
13
14
15
16
17
18
19
20
21
22
23
# 针对不同兼容性的浏览器进行加载
对于可以执行es6的浏览器可以直接用文件,不需要进行babel浪费资源 在script标签上添加 type="moudle" 即可
# 用函数式编程进行节流
在assets文件夹下 scripts 下创建 util.js
var ArrayProto = Array.prototype;
var push = ArrayProto.push;
var _ = function (obj) {
    if (!(this instanceof _)) return new _(obj);
    this._wrapped = obj;
};
_.VERSION = '1.0.1';
_.each = function (obj, iteratee) {
    if (Array.isArray(obj)) {
        for (const item of obj) {
            iteratee && iteratee.call(_, item);
        }
    }
};
_.throttle = function (fn, wait = 500) {
    let timer;
    return function (...args) {
        if (timer == null) {
            timer = setTimeout(() => timer = null, wait);
            return fn.apply(this, args);
        }
    }
}
_.isFunction = function (obj) {
    return typeof obj == 'function' || false;
};
_.functions = function (obj) {
    var names = [];
    for (var key in obj) {
        if (_.isFunction(obj[key])) names.push(key);
    }
    return names.sort();
};
//混合静态方法到原型链共享属性上
_.mixin = function (obj) {
    const arrs = _.functions(obj);
    console.log("对象的全部函数📚", arrs);
    _.each(_.functions(obj), function (name) {
        var func = _[name] = obj[name];
        //分两步走
        // _(["a","b"]).each(function(){});
        _.prototype[name] = function () {
            var args = [this._wrapped];
            push.apply(args, arguments);
            //指正的执行each
            func.apply(_, args);
        };
    });
    return _;
};
_.mixin(_);
export default _;
2
3
4
5
6
7
8
9
10
11
12
13
14
15
16
17
18
19
20
21
22
23
24
25
26
27
28
29
30
31
32
33
34
35
36
37
38
39
40
41
42
43
44
45
46
47
48
49
50
51
52
在index.html 中添加按钮
<input type="button" value="点击添加" id="js-btn-add">
在 index.js 中绑定事件,引用写的节流方法
import _ from './util.js';
$('#js-btn-add').click(_.throttle(function() {
    console.log(Math.random());
}))
2
3
4
# 容错处理
根目录创建 middleware 文件夹,创建 errorHandle.js做容错处理
# 404处理
判断页面状态,如果是正常的话就直接返回,如果是404了就将页面倒到404页面。 errorHandle.js
const errorHandler = {
    error(app){
        app.use(async (ctx, next) => {
            await next();
            if (404 !== ctx.status) {
                return;
            }
            ctx.status = 404;
            ctx.body = `<script type="text/javascript" src="//qzonestyle.gtimg.cn/qzone/hybrid/app/404/search_children.js" charset="utf-8" homePageUrl="/" homePageName="回到我的主页"></script>`;
        });
    }
}
module.exports = errorHandler;
2
3
4
5
6
7
8
9
10
11
12
13
根据 koa 洋葱模型,将错误处理中间件放在整个app最上面。 app.js
const Koa = require('koa');
const app = new Koa();
const config = require('./config/index');
const controllersInit = require('./controllers/index');
const render = require('koa-swig');
const co = require('co');
const serve = require('koa-static');
// ---------------------------------------------------------------
const errorHandler = require('./middlewares/errorHandler');
// ---------------------------------------------------------------
app.context.render = co.wrap(render({
    root: config.viewDir,
    autoescape: true,
    cache: false,
    ext: 'html',
    writeBody: false
}))
app.use(serve(config.staticDir));
// ---------------------------------------------------------------
errorHandler.error(app);
// ---------------------------------------------------------------
// 路由的注册中心
controllersInit(app);
app.listen(config.port, () => {
    console.log('服务启动成功');
});
2
3
4
5
6
7
8
9
10
11
12
13
14
15
16
17
18
19
20
21
22
23
24
25
26
# 服务错误处理
如果服务器报500错误
安装 log4js
yarn add log4js
app.js
const Koa = require('koa');
const app = new Koa();
const config = require('./config/index');
const controllersInit = require('./controllers/index');
const render = require('koa-swig');
const co = require('co');
const serve = require('koa-static');
const errorHandler = require('./middlewares/errorHandler');
//--------------------------------------------------------------------
const log4js = require('log4js');
log4js.configure({
    appenders: { cheese: { type: 'file', filename: __dirname + '/logs/yd.log' } },
    categories: { default: { appenders: ['cheese'], level: 'error' } }
});
const logger = log4js.getLogger('cheese');
app.context.logger = logger;
//-------------------------------------------------------------------------
app.context.render = co.wrap(render({
    root: config.viewDir,
    autoescape: true,
    cache: false,
    ext: 'html',
    writeBody: false
}))
app.use(serve(config.staticDir));
errorHandler.error(app);
// 路由的注册中心
controllersInit(app);
app.listen(config.port, () => {
    console.log('服务启动成功');
});
2
3
4
5
6
7
8
9
10
11
12
13
14
15
16
17
18
19
20
21
22
23
24
25
26
27
28
29
30
31
在 errorHandle.js 中添加
const errorHandler = {
    error(app){
        //--------------------------------------------------------
        app.use(async (ctx, next) => {
            try {
                await next();
            } catch(error) {
                ctx.logger.error(error);
                ctx.status = error.status || 500;
                ctx.body = "❎ 项目出错";
            }
        });
        // -------------------------------------------------------
        app.use(async (ctx, next) => {
            await next();
            if (404 !== ctx.status) {
                return;
            }
            ctx.status = 404;
            ctx.body = `<script type="text/javascript" src="//qzonestyle.gtimg.cn/qzone/hybrid/app/404/search_children.js" charset="utf-8" homePageUrl="/" homePageName="回到我的主页"></script>`;
        });
    }
}
module.exports = errorHandler;
2
3
4
5
6
7
8
9
10
11
12
13
14
15
16
17
18
19
20
21
22
23
24
此时当后台出错的时候就可以显示想显示的东西了
# 由后台yii提供接口
首先修改php文件 CountryController.php 添加两行内容,要在上面引入Response
use yii\web\Response;
...
public function actionIndex()
    {
        $searchModel = new CountrySearch();
        $dataProvider = $searchModel->search(Yii::$app->request->queryParams);
        // ------------------------------------------------
        YII::$app->response->format = Response::FORMAT_JSON;
        return $dataProvider->getModels();
        // -------------------------------------------
        // return $this->render('index', [
        //     'searchModel' => $searchModel,
        //     'dataProvider' => $dataProvider,
        // ]);
    }
...
2
3
4
5
6
7
8
9
10
11
12
13
14
15
16
回到node部分 二次封装一下axios 安装axios
yarn add axios
创建utils 文件夹, 创建 SafeRequest.js 文件,用来管理请求
const config = require('../config');
const axios = require("axios");
class SafeRequest {
    constructor(url) {
        this.url = url;
        this.baseUrl = config.baseUrl;
    }
    get(params = {}) {
        let result = {
            code: 0,
            message: "",
            data: []
        }
        return new Promise((resolve, reject) => {
            axios.get(this.baseUrl + this.url, {
                params
            })
                .then(function (response) {
                    if (response.status == 200) {
                        const data = response.data;
                        result.data = data;
                        resolve(result);
                    } else {
                        result.code = 1;
                        result.message = "后台请求出错";
                        reject(result);
                    }
                })
                .catch(function (error) {
                    result.code = 1;
                    result.message = error;
                    reject(result);
                });
        })
    }
}
module.exports = SafeRequest;
2
3
4
5
6
7
8
9
10
11
12
13
14
15
16
17
18
19
20
21
22
23
24
25
26
27
28
29
30
31
32
33
34
35
36
37
models 下的Books.js
// -----------------------------------------------
const SafeRequest = require("../utils/SafeRequest");
// -----------------------------------------------
class Books{
    /**
     * Books类,实现获取后台有关于图书相关的数据类
     * @class {type}
     *
     */
    /**
     * Books类,实现获取后台有关于图书相关的数据类
     * @param {object} app app KOA2执行的上下文
     *
     */
    constructor(app) {
        this.app = app;
    }
    /**
     * 获取后台图书的全部列表
     * @param {*} options options 设置访问数据的参数
     * @example
     * return new Promise
     * getList(options)
     */
    getList(options) {
        // -----------------------------------------------
        const safeRequest = new SafeRequest("country");
        return safeRequest.get(params)
        // -----------------------------------------------
    }
}

module.exports = Books;
2
3
4
5
6
7
8
9
10
11
12
13
14
15
16
17
18
19
20
21
22
23
24
25
26
27
28
29
30
31
32
33
controllers 下的BooksController.js
const Books = require('../models/Books');
class BooksController {
    async actionIndex(ctx, next) {
        const $model = new Books();
        // -----------------------------------------
        const result = await $model.getList();
        console.log("返回的值", result);
        // ctx.body = result;
        ctx.body = await ctx.render('Books/list', {
            result
        });
         // -----------------------------------------
    }
    async actionCreate() {
        ctx.body = await ctx.render('Books/create');
    }
}
module.exports = BooksController;
2
3
4
5
6
7
8
9
10
11
12
13
14
15
16
17
18
修改list.html 获取数据
 {% extends '../layouts/layouts.html' %}

{% block title %}新闻列表{% endblock %}

{% block head %}
{% parent %}

{% endblock %}
{% block content %}
<div>
    <h1>新闻列表</h1>
    <ul>
    {% for item in result.data %}
        <li>{{item.author}}</li>
    {% endfor %}
    </ul>
<div>
{% endblock %}
{% block scripts %}
<script>
console.log('新闻列表')
</script>
{% endblock %}
2
3
4
5
6
7
8
9
10
11
12
13
14
15
16
17
18
19
20
21
22
23
为了减少查找文件路径,使用别名
yarn add module-alias
在app.js 最上面引入
require('module-alias/register');
在 package.json 中添加的
{
    ...
    "_moduleAliases": {
        "@root": ".",
        "@config": "config",
        "@models": "models"
    },
    ...
}
2
3
4
5
6
7
8
9
这样就可以把原来引用的 config 直接换成 @config
const config = require('../config');
// 换成
const config = require('@config');
2
3
← 实战(四) gulp 流清洗 工程化实战 →